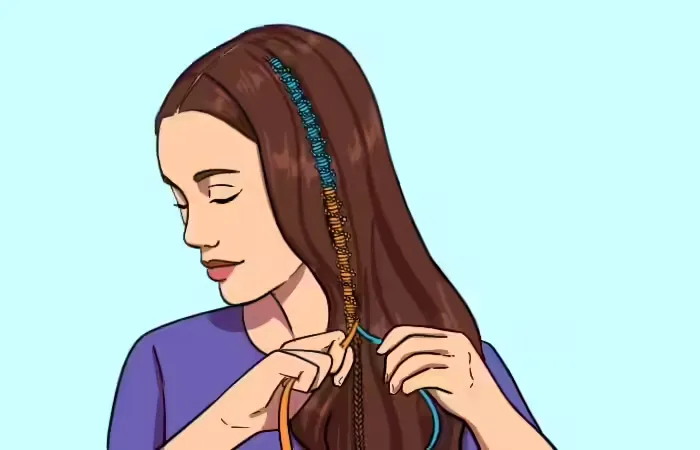
Acquiring the skill of creating hair wraps is an easy yet effective approach to add some colour to your everyday hairstyle. Hair wraps are a great way for anyone to show their personality and sense of style, and they’re a great way to achieve a colourful look without using permanent colouring. They make a striking fashion statement and convey a carefree vacation atmosphere. Once a dead giveaway of a free spirit, hair wraps have recently gained popularity among people looking to add a little flair to their everyday hairstyle without having to worry about permanent hair colour damage. It is obvious why hair wraps continue to pique the curiosity and creativity of fashionistas worldwide given their abundance of styling options that come with no obligations.
Different Types Of Hair Wraps
A fun do-it-yourself fashion project, these wraps are great for switching up your look. When exploring the world of hair wraps, there are many options available, including:
Simple Thread Wrap
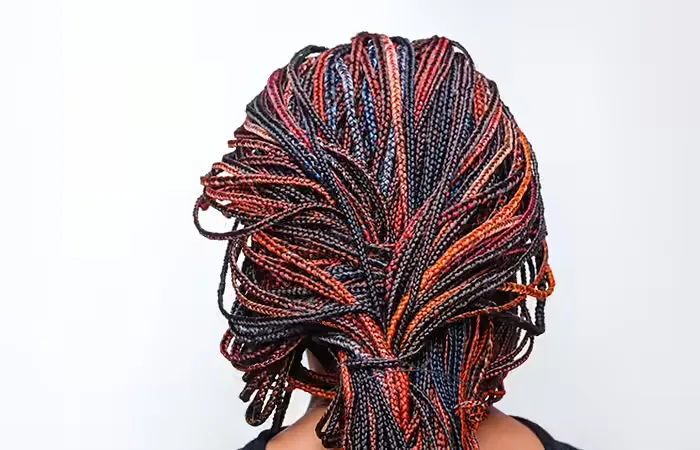
A portion of braided hair is adorned with this style by deftly weaving embroidery threads around it. For a traditional, clean appearance, you can tightly spiral a variety of colourful threads. This is a more conventional form of hair wrapping where you weave the thread with the braid, though you can braid your hair and then wrap it around with colourful thread. If you want to learn how to do a hair wrap, here is the best place to start.
Beaded Wrap
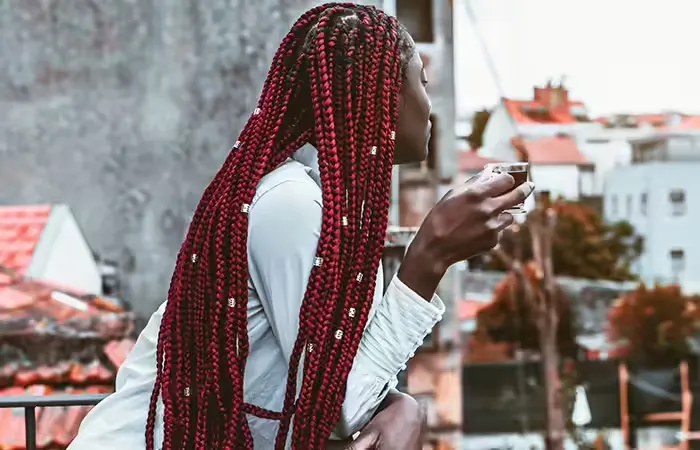
For those who prefer a little more shine, this wrap incorporates shimmering beads into the hair wrapping procedure. To create a visually striking effect, choose beads that either match or contrast with the colours of your thread and incorporate them into your braid. This hair wrap elevates an otherwise plain hairstyle with a whimsical and artistic touch.
Chunky Yarn Wrap
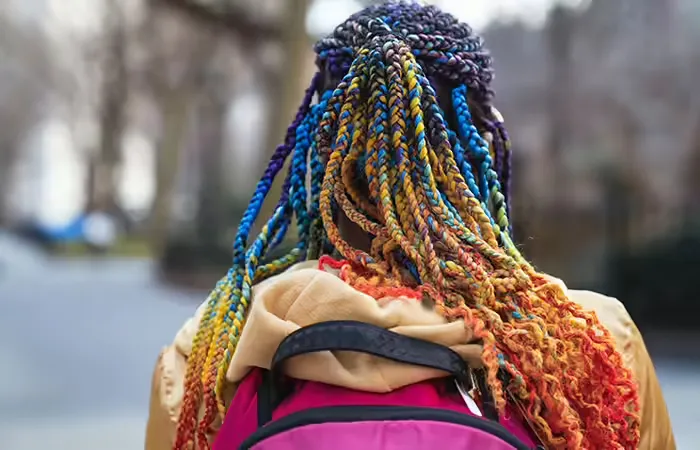
If you prefer your wraps to be vibrant and textured, this one will definitely catch your attention. By replacing the standard threads with sturdier yarn, this inventive hair wrap style is distinguished by its volume and tactile appearance. Its thickness adds a stylish touch that gives your hair a twist that makes a statement.
Signature Wrap
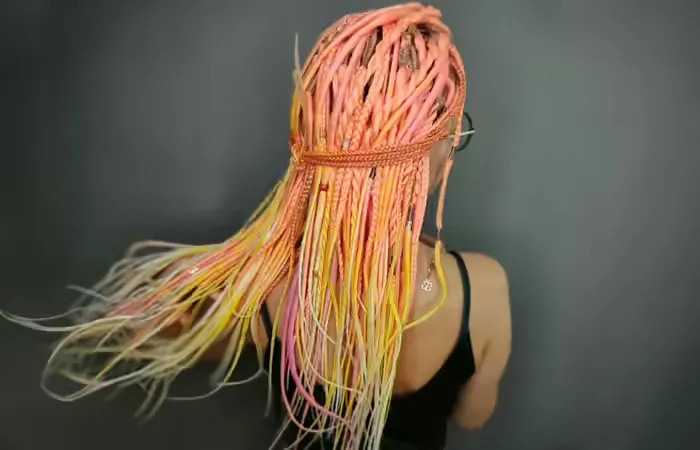
With the variety of textures and components this lovely hair wrap incorporates—such as beads, charms, and threads—you have complete creative control to design a wrap that is as distinctive as you are. Create a hair wrap masterpiece that expresses your individuality and sense of style by personalising each twist and turn. You’re left with colourful, friendship bracelet-like braided hair strands.
These are but a few examples of styles. As you get proficient at applying a hair wrap, feel free to play around with different hues, textures, and accents.
Now that you know about the many kinds of hair wraps, it’s time to think about the supplies you’ll need to make your own. Making your own hair wraps is a really fulfilling and expressive hobby. Prepare to embrace your inner creative side as we get into the specifics of all the supplies you’ll need for hair wraps.
Things You Need For Hair Wrap
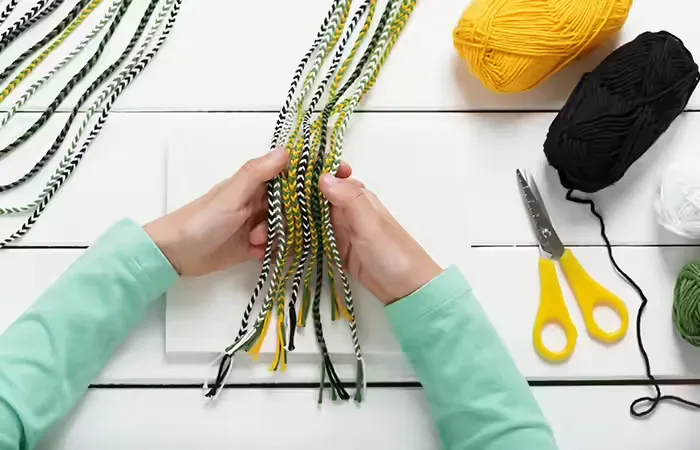
Make sure you have the necessary materials on hand before beginning to create a hair wrap. Here’s a concise inventory of what you’ll need if you decide it’s time to learn how to apply a hair wrap:
Vibrant Stitching Using yarn, floss, or thread, gather a variety of your preferred colours. These threads will create a colourful cocoon around your hair, whether you choose muted tones for a more subdued look or rainbow shades for a bright wrap.
Hair Brush vs. Comb: A comb is necessary to tame any stray hair strands and tease the hair you plan to wrap.
Scissors: To cut your thread to the appropriate length, you’ll need a sharp pair of scissors. For a clean finish, accuracy is crucial.
To secure your wrap at the beginning and end, use hair ties, elastics, or rubber bands to knot off the end of your hair braid.
Beads, charms, or feathers (optional): Add some ornamental details to your wrap to make it uniquely yours. Put some charms or beads on wherever you want them to stand out.
Bobby pins: These can be used to secure the vibrant threads in place as you weave them in.
Hair Extensions: If your hair is curly or shorter, you can also use hair extensions.
Hair Serum: Using hair serum will improve the manageability and sheen of your hair.
The only things left to add are your imagination and perseverance to the mix after these supplies and tools lay the groundwork for a successful hair wrapping session!
Having prepared the necessary equipment and finishing touches, the next thrilling stage is to go from preparation to execution. This comprehensive tutorial will lead you through every step of the process, from the first braid to the last knot, enabling you to personalise every wrap. Now let’s get wrapping and roll up our sleeves!
How To Do A Hair Wrap?
Are you prepared to finish off your look with style? Now let’s learn how to apply a hair wrap. There are several approaches to think about depending on the style you want. There’s a wrapping style out there for every taste, be it elegant and understated, whimsical and playfully detailed, or just elegant.
1. Simple Hair Wrap Method
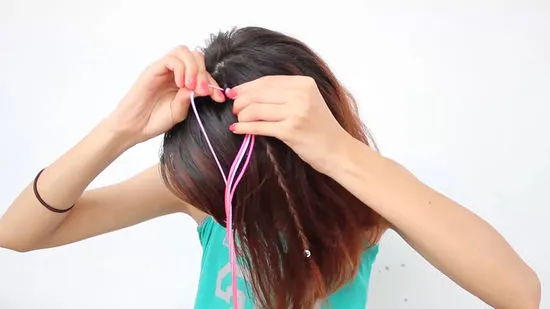
- Start with tangle-free, neatly combed hair. For improved grip, you can use a serum, texturising powder, or spray.
- Use a hair elastic to fasten the end of the portion of hair you braided.
- Cut threads two to three times longer than the strand; if desirable, use different colours.
- To keep it in place while wrapping, use a bobby pin.
- Tie threads firmly at the bottom of a small, tightly braid.
- Tightly and consistently wrap the first colour of thread around the braid.
- To switch colours, tie off the current thread, select the next colour, and wrap again.
- When you’re done, trim off any extra thread and double-knot the thread at the bottom of the braid.
Blogger Jessica talks about her experience wearing a hair wrap on her daughter. “You can do a lot with just wrapping the string for designs or patterns,” she says in her guide. You can create patterns by giving each colour a specific duration. Alternatively, wrap each piece of thread around the hair once, then switch up the colours. You can also draw Xs around the solid colours you have (i) if you’d want something a little more intricate.
2. Forward Knot Hair Wrap Method
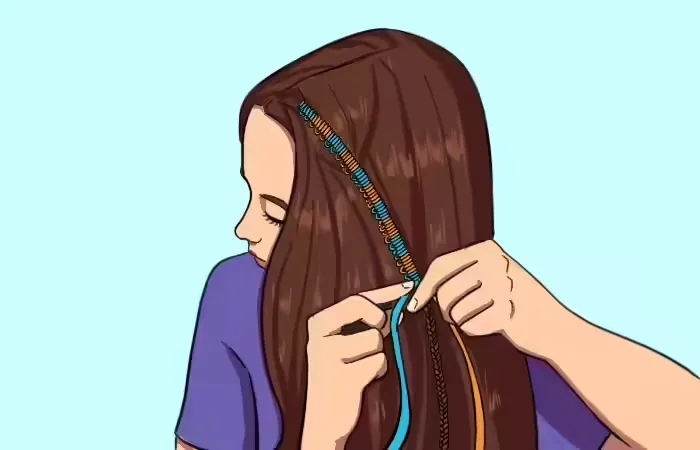
- Begin by plaiting a portion of hair in a braid, starting with a knotted thread.
- Loop the thread over and under the braid, draw it through the loop, and tighten it to form a forward knot.
- Just use a fresh thread and repeat after you’re ready to switch colours.
- When finished, snip off any extra thread and tie a finishing knot to secure the end.
3. Chinese Staircase Hair Wrap Method
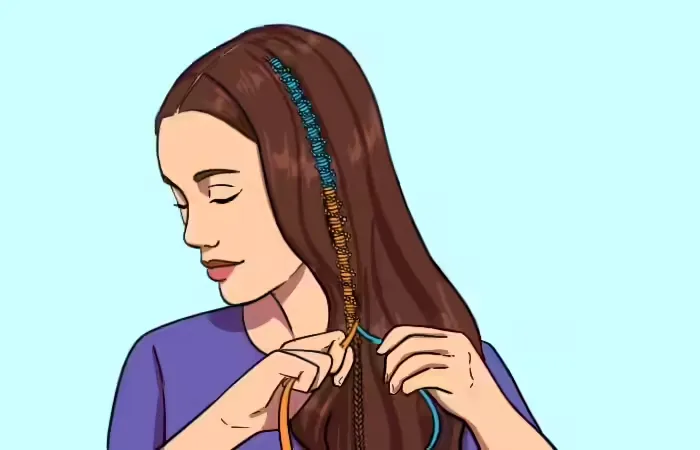
- Prepare a portion of hair for braiding by tying a thread at the top.
- Encircle the hair in a ‘4’ form, then loop the thread through and pull it to the top of the braid. Continue working downhill with this.
- To construct the wrap, keep knotting, making sure that the spiral pattern remains constant as you work your way down the braid.
- As you proceed, tie in a new thread and repeat the knot pattern to change the colour of the thread.
- At the conclusion of the braid, knot the last thread firmly, then cut off any extra embroidery thread.
- To give the braid additional oomph, you can embellish it with beads and charms. This is a step that can be skipped.
It’s also crucial to recognise the extra benefits of this fashionable method as you grow more accustomed to wrapping those braids. Hair wraps provide a purpose beyond simply being a stylish accessory. They shield those priceless strands and serve as a palette for colour experiments. See section for more information.
Benefits Of Hair Wrapping
Adding a hair wrap doesn’t just mean boosting your style sense. Examining the advantages of hair wrapping reveals that it’s much more than just a passing fad.
- Locks In Moisture: By keeping your hair in strands, you can prevent dryness by preserving its natural moisture.
- Noncommittal Colour Experimentation: You can experiment with colours without committing to a look by utilising wraps, which protects your hair from chemicals.
- Styling Break: By preventing heat and manipulation damage, hair wraps offer a break from regular hair styling equipment and procedures.
- Self-Care: Learning how to wrap your hair may be a calm and contemplative do-it-yourself activity that provides a deliberate diversion from your daily routine.
- Simple Unwrapping: Changing changing hairstyles doesn’t require a lot of commitment or stress on your hair because it’s so easy to do.
- Long-Lasting: Hair wraps can endure for several months to a year if properly applied and cared for.
In the end, hair wrapping achieves the ideal harmony between expressing your individuality and safeguarding your hair, enhancing its health.
Finding out how long hair wraps last is the next step after studying their advantages. This will guarantee that you can take pleasure in the protection of your hair and the extra pop of colour without having to commit. As we move from comprehending the benefits of hair wrapping to discussing best practices and maintenance advice, keep in mind that doing so will help your hair wraps last longer.
Tips To Maintain Hair Wraps Last Longer
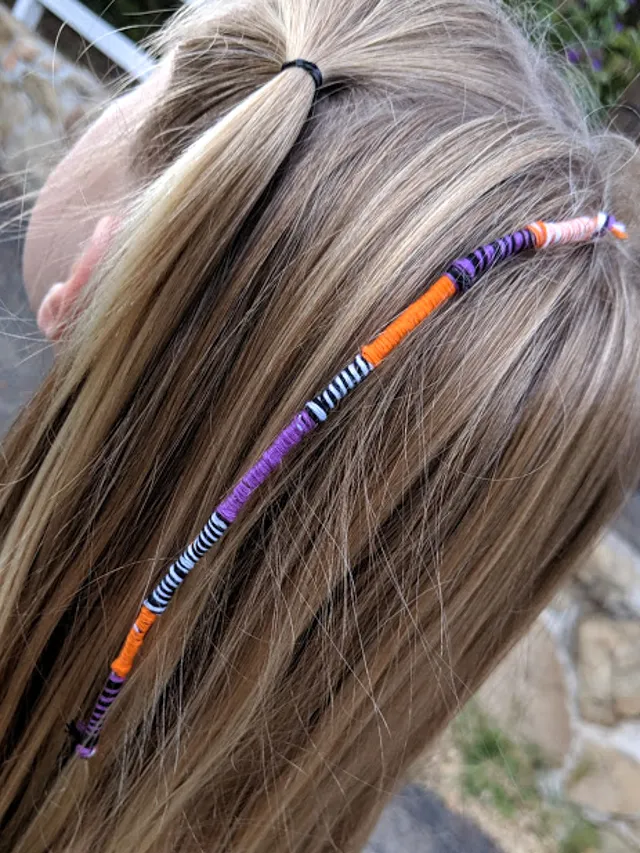
Proper maintenance guarantees that your hair wraps will keep giving your hair a splash of colour and personality for as long as feasible. The following advice will make your hair wraps last longer:
- Keep It Dry: Although hair wraps can be cleaned, reducing their exposure to moisture extends their lifespan. When taking a bath, tuck them away under the shower cap to keep them as dry as possible.
- Gently Cleaning: If you discover that your hair wrap needs to be cleaned, do it carefully using a light shampoo; do not scrape vigorously. After, gently pat it dry.
- Prevent Harsh Chemicals: To prevent your wrapped strands from deteriorating or causing the colours to bleed, keep them away from bleaches, dyes, and other harsh chemicals.
- Sun Protection: UV rays can damage your skin, but they can also make the colours of your wraps less bright. Wear a scarf or cap to protect them when you’re outside for extended periods of time.
- Tidy Trims: Over time, your wrap’s ends may fray. To keep your hair wrap looking nice, carefully clip any straggling fibres with scissors.
Keeping these suggestions in mind will improve the health of your hair in addition to extending the life of your wraps. Furthermore, unwinding a well-maintained wrap is hassle-free when the time comes for a change of style. If you want to perform a hair wrap that lasts, incorporate these suggestions into your wrapping regimen.
How To Remove A Hair Wrap String?
To prevent snags or damage to your hair, remove your hair wrap carefully when the time comes. This is a simple tutorial that will help you remove a hair wrap string:
- Locate the knot at the base of your wrap where the threads are tied off.
- Carefully cut the knot with a pair of scissors. Ensure that no hair strands get caught in the cut while doing this.
- With gradual, delicate tugs, start unravelling the wrap by unwinding the threads from the bottom up.
- If you run into some resistance while working, stop and gently untangle any hair or thread tangles.
- There might be a few tiny thread remnants once it’s been opened. To remove any remaining hair, lightly comb through your hair.
Additionally, keep in mind that you shouldn’t wear your wraps for longer than a month. Recall, patience is essential in this situation. Allow enough time for this process, particularly if you want to prevent damage of your hair. Referring to the step-by-step instructions for applying a hair wrap will come in handy for your next artistic endeavour when it’s time for a new one.
A fun approach to add some style to your look without causing damage to your hair is to learn how to do a hair wrap. You can try out different hairstyles and give your hair some protection at the same time by wrapping your hair. When you’re ready for a change, taking off your hair wrap only requires careful attention to a few basic instructions. In the end, a hair wrap adds your own touch to your hairdo, and how you choose to sport it is all part of the adventure, whether you keep it basic or add eclectic beads.


